How To: Create Bar Code Labels for Items
By utilizing system reports and your word processor's mail merge feature, you can easily print bar code labels for assets or inventory items. Using bar code labels can make managing your inventory and inspecting your assets easier and less error prone.
To create bar code labels, you must have a bar code font installed in the C:/Windows/Fonts directory. Barcode fonts are available for free download from several internet sites.
 Generate the Report
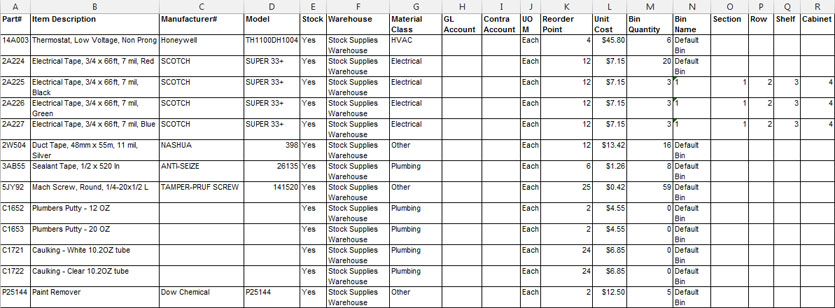
The first step is to run the report that will serve as the data source for generating your bar code labels. You can generate labels for assets by running the Asset Listing report in the Asset module or generate labels for inventory items by running the Material Item Listing report in the Inventory module.
In this example, we will generate labels for inventory items, but the same basic procedure can be used for assets.
- Access the Inventory module by clicking the Inventory link.
- Select the Run Report tab.
- In the Select a report field, select Material Item Listing.
-
Specify report criteria.
You can narrow your data to include only certain types of items or only items from a particular warehouse.
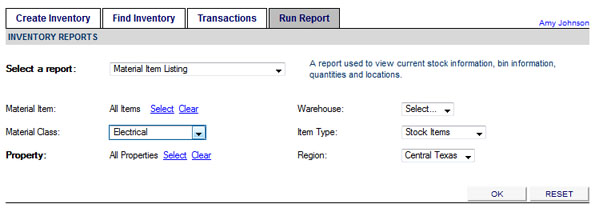
- Click OK to run the report.
-
Save the report in .XLS format.
Create the Labels Using Mail Merge
This procedure uses Word 2013, but the process is similar in all Word versions.
- Create a new, blank Word document.
- Click the Mailings tab.
-
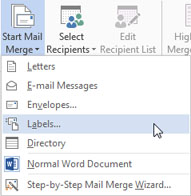
Click Start Mail Merge and select Labels.
-
Select the desired label size and click OK.
In this example, we used the 30 Per Page label size, oriented horizontally.
-
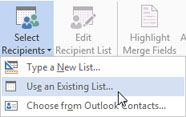
To specify the data source, click Select Recipients and then select Use an Existing List.
- Locate and select your inventory (or asset) report as your data source.
-
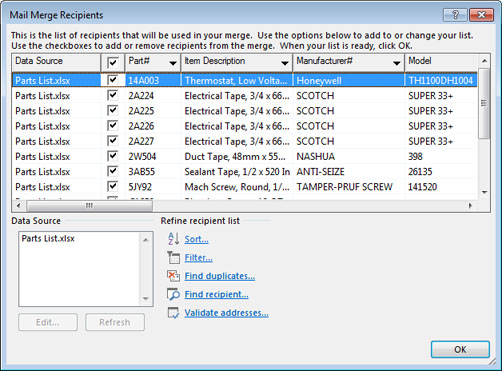
If you want to exclude particular items from the data, click Edit Recipient List and use the check boxes to exclude rows.
-
To specify the fields to include in the labels, click Insert Merge Field.
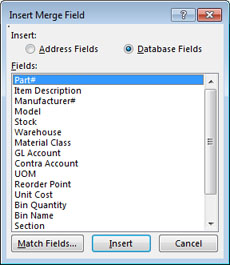
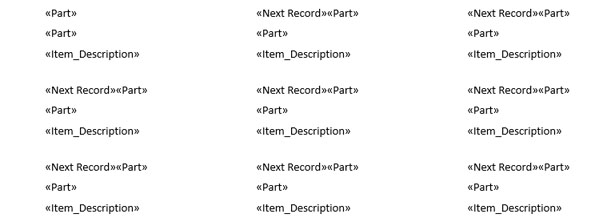
In this example, we put Part on the first line (which will be converted to a bar code), Part on the second line (which will be left in a readable font), and Item Description on the third line. You can select additional fields if you want them included on the labels.
If you are creating labels for assets, you may want to use the Asset # twice and the Asset Name or Manufacturer/Model.
-
Click Update Labels to repeat the selected fields on every label.
-
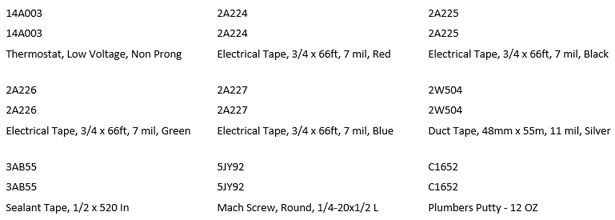
Click Preview Results to preview the data merge.
Each label should now contain the information for each item in the data source.
-
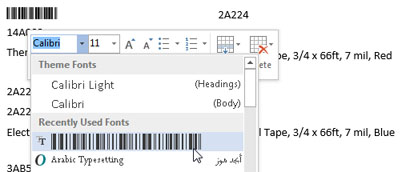
On the first label, select the first <<Part>> field and change it to the bar code font.
-
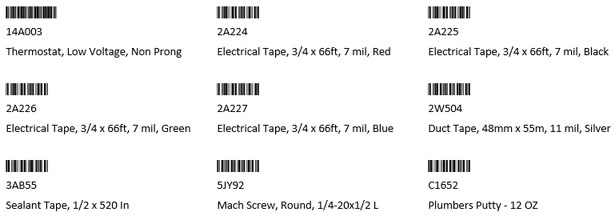
Click Update Labels to change the first field to bar code font on every label.
-
Click Finish and Merge to complete the document.
This step takes the label template you have defined and creates the final Word document from it. You can elect to edit and save the document, send it to the printer, or email it to another user.